
Rapsberry PI 4 is (finally) relatively powerful hardware and suited to host a UrBackup appliance. Specifically:
- 4 GB RAM
- 64 bit support
- USB 3
- Gigabit ethernet
- Build-in Wifi
The RAM is of course not ECC-RAM which makes it unsuited for large UrBackup appliance instances or serious use (you could always risk it, see notes on ECC RAM section on the bottom).
The main advantages of Raspberry Pis are that they are widely available, have good support and merely by having so many people focused on them, having few bugs.
A few gotchas when setting up a UrBackup server:
- Use the SD card as a read-only device for booting the operating system. Regularly writing to the SD card will break it because SD cards are not designed for such use. There are “industrial” SD cards designed for regular (random) writes (e.g. SwissBit) but they cost way too much (an external USB SSD is cheaper)
- I had a lot of problems getting the 64bit Linux kernel to boot, but I guess this will improve
- Power supply is still an issue. The USB SSD drive I was using caused issues because (I think) the power supplied by the Raspberry wasn’t enough. I’d guess the Raspberry + USB SDD need a 4A power supply at least.
The system plus costs (w.o. taxes):
| Raspberry PI 4 Model B 4GB | 50 € |
| Intenso SSD 256GB | 37 € |
| 32GB microSD SDHC | 3 € |
| Raspberry Pi 4 Case | 6 € |
| Powered USB 3 hub 5V/4A (20W) | 20 € |
| USB 3 to USB C cable | 7 € |
| Sum (w.o. taxes) | 123 € |
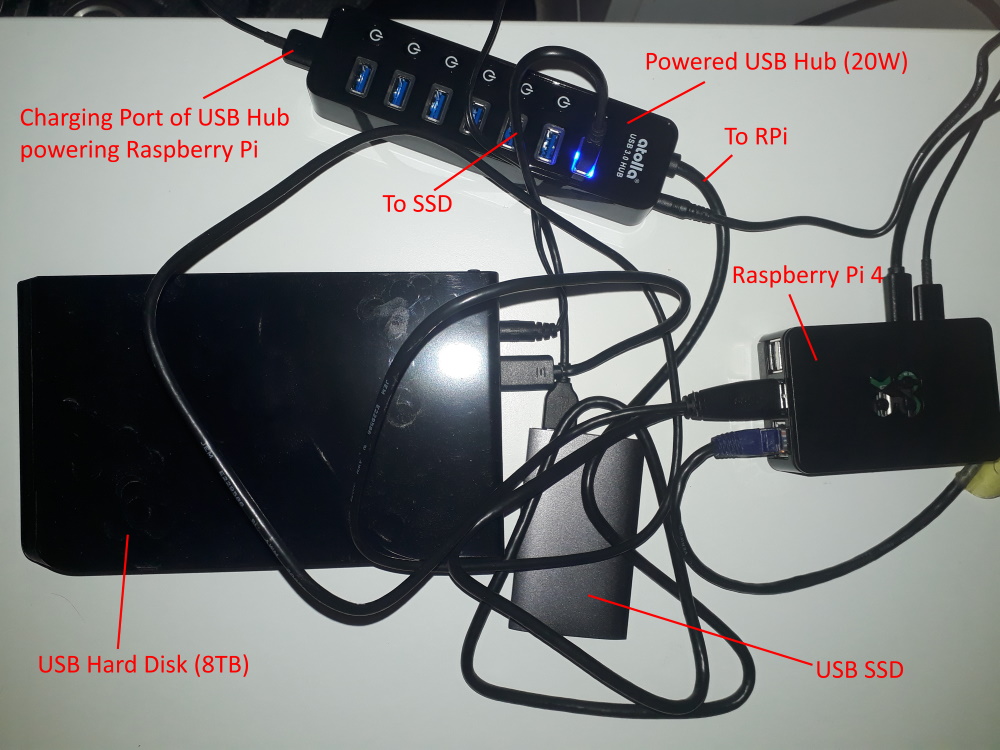
Once you have the base system, you can add USB disks as backup storage, use those 2-bay docking stations + disks or use larger 4-bay USB external disk enclosures. Adding single USB disks is probably cheapest.
Alternatively, if using the Infscape UrBackup Appliance, you can store your backups directly to the cloud (Amazon S3 or compatible) using the SSD as local cache.
Software
I’ll describe how to setup the Infscape UrBackup Appliance. You can of course also install Raspbian and install UrBackup on that.
Download the image for the SD card.
Write the image to the SD card using e.g. Win32 Disk Imager.
For setup, you’ll have to attach the Raspberry PI to your wired ethernet network. After setup, you can run it via Wifi only. Put the SD card into the Raspberry and start it up. After boot it’ll show its IP address on its display. Alternatively, you can look for new devices on your router, or using an IP range scanning tool.
Browse to http://YOURRASPBERRYIP and follow the setup wizard.
Make sure the SSD is attached and click on “+Use device” on the status screen. Then use the SSD as external system disk (UrBackup database, logs and temporary files will be stored on the SSD instead of the SD card).
If you want to store the backups to S3, select that you want to use the system disk as cache (or attach an additional SSD as cache only disk). If you want to store the backups to a local (USB) disks I’d recommend to also use the system disk as cache for the local USB disks (cached, auto-layout RAID).
ECC-RAM
If you are unlucky a single bit error in your Raspberry PI RAM can make the whole backup storage unwritable. In that case you’ll have to either make a new backup server and replicate everything (that is still readable) to that one, or simply start with a new backup server. The worst case is that it corrupts data in such a way that it does not detect the corruption, in which case you’ll only find there is a problem when you restore/actually want to use the backup.
That said, the probability of the RAM having problems is perhaps very low. We can probably trust the Raspberry PI foundation to have selected reliable RAM plus settings that minimize the risk of corruption.
The cloud/RAID backup storage has an advanced option “Size of in-memory write-back cache”. Per default it is disabled and you probably shouldn’t use it if you don’t have ECC-RAM as it increases the time data is kept in memory before it is written to checksum protected storage.