Linux image backups with UrBackup 2.5.y

So I’ve resisted the idea of Linux image backups for a while. After all, one can just backup all the files, right? True, even with Linuxs fast file access this might take a bit longer than doing an image backup if one has a a lot of files and one wants to back them all up…

Image backups also make backups and restores a lot easier. One doesn’t have to think about what to backup, instead it’s just the whole thing. When restoring, it’s just one step: Copy back the volume.

Advantages:

  • Everything is backed up
  • Content does not affect backup or restore performance (e.g. many small files don’t slow down backups and restores)
  • 1:1 backups and restores of volumes

Disadvantages:

  • Can’t select subset to backup (e.g. exclude temporary file data)
  • Can’t migrate to different file system on restore
  • File level deduplication doesn’t work
  • E.g. defragmentation causes changes to backup

The following are step-by-step instructions on how to backup a Linux VPS.

Backup VPS (Step-by-step)

Assumption: VPS is running Debian 10/buster. 2.5.x server + client is used.

1. Add new client on server web interface:

2. Add active/Internet client

3. Copy & paste Linux client installation command and follow setup:

4. Reboot client/VPS (if not using dattobd)

5. Create image backup (“C” gets automatically translated to the Linux root volume)

Restore VPS (Step-by-step)

1. Browse to image backup in “Backups” tab on web interface

2. Click on restore Linux image

3. Copy & paste into new Debian 10/buster instance and follow instructions:

Ransomware canary

One upcoming feature is the ransomware canary file. The idea is that UrBackup generates a random file that looks like a file that potential ransomware should definitely encrypt. The backup server then checks if this file was changed or deleted during every backup. If ransomware encrypts the file the backup server will notice, fail backups and the backup server admin will get notified via alerts, can easily see the last known good backup and those good backup won’t get replaced by bad backups (backups with ransomware encrypted files).

The setting to configure this is only present on the server. For example it would be set to

Users/*/Documents/^important (don’t delete)/important

Clients would go into the „Users“ backup path, descend into all „Documents“ directories below any folder directly below „Users“. Create a „important (don’t delete)“ folder if it doesn’t exist yet (that’s what the caret does). Then create a (random) „important-[SERVER TOKEN].docx“ canary file in that folder. The owner of the folder and file is set intelligently to the owner of sibling files or parent folders.

For now it is a very basic implementation. I.e.,

  • It only uses a „docx“ file
  • The template „docx“ is bundled with the client and only minimally modified on each client
  • Only works with file backups

If a user moves, deletes or modifies a canary file the remedy to get backups working again would be to set the canary paths to empty for one file backup.

Thoughts? Improvement ideas?

Raspberry PI 4 Backup Appliance update

An update for the Raspberry PI 4 backup appliance (last post). Raspberry PI specific changes:

  • Upgrade Linux kernel to 5.4.y. This allows e.g. a swap file on the system disk
  • Removed the USB 3.0 UAS driver, since it doesn’t seem to work (with the disks I tested it with — see also this thread). This makes USB disks slower, but at least it works reliably
  • Use xchacha12+adiantum as system disk encryption method since RPI4 doesn’t have AES CPU instructions. This significantly increases performance

    If you want to use it manually outside the appliance use
    cryptsetup luksFormat --cipher xchacha12,aes-adiantum-plain64 --type luks2 --sector-size 4096
    to format the encrypted disk

Download the image for the SD card.

Write the image to the SD card using e.g. Win32 Disk Imager.

Discussion

Discuss the Infscape UrBackup Appliance here.

Raspberry Pi 4 backup appliance

Rapsberry PI 4 is (finally) relatively powerful hardware and suited to host a UrBackup appliance. Specifically:

  • 4 GB RAM
  • 64 bit support
  • USB 3
  • Gigabit ethernet
  • Build-in Wifi

The RAM is of course not ECC-RAM which makes it unsuited for large UrBackup appliance instances or serious use (you could always risk it, see notes on ECC RAM section on the bottom).

The main advantages of Raspberry Pis are that they are widely available, have good support and merely by having so many people focused on them, having few bugs.

A few gotchas when setting up a UrBackup server:

  • Use the SD card as a read-only device for booting the operating system. Regularly writing to the SD card will break it because SD cards are not designed for such use. There are “industrial” SD cards designed for regular (random) writes (e.g. SwissBit) but they cost way too much (an external USB SSD is cheaper)
  • I had a lot of problems getting the 64bit Linux kernel to boot, but I guess this will improve
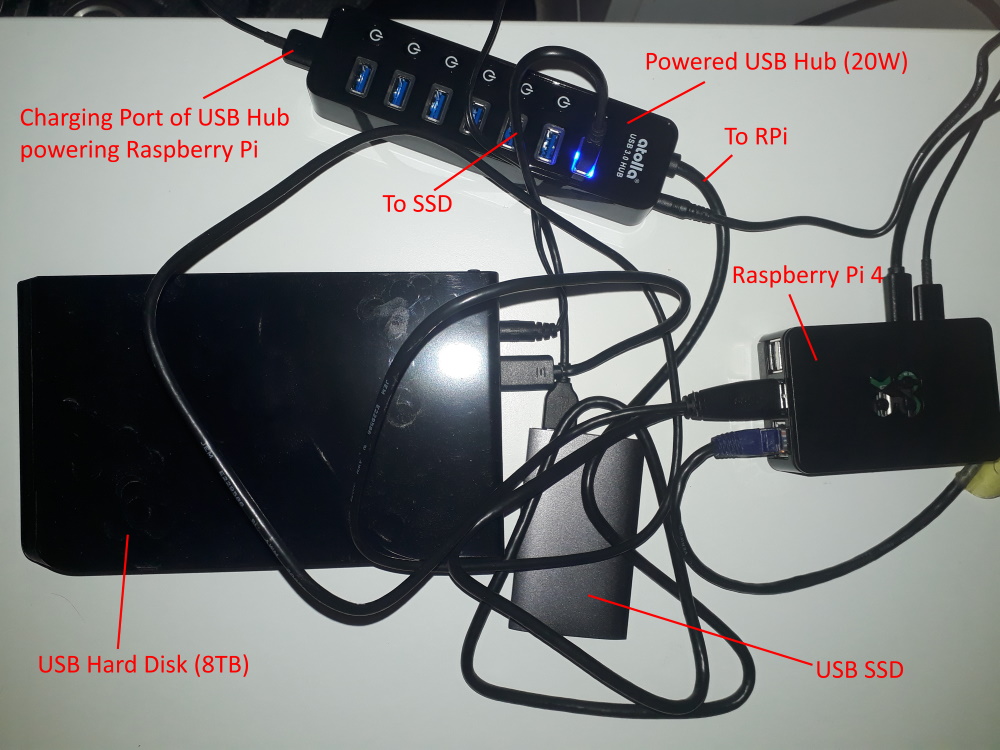
  • Power supply is still an issue. The USB SSD drive I was using caused issues because (I think) the power supplied by the Raspberry wasn’t enough. I’d guess the Raspberry + USB SDD need a 4A power supply at least.

The system plus costs (w.o. taxes):

Raspberry PI 4 Model B 4GB50 €
Intenso SSD 256GB37 €
32GB microSD SDHC3 €
Raspberry Pi 4 Case6 €
Powered USB 3 hub 5V/4A (20W)20 €
USB 3 to USB C cable7 €
Sum (w.o. taxes)123 €

Once you have the base system, you can add USB disks as backup storage, use those 2-bay docking stations + disks or use larger 4-bay USB external disk enclosures. Adding single USB disks is probably cheapest.
Alternatively, if using the Infscape UrBackup Appliance, you can store your backups directly to the cloud (Amazon S3 or compatible) using the SSD as local cache.

Software

I’ll describe how to setup the Infscape UrBackup Appliance. You can of course also install Raspbian and install UrBackup on that.

Download the image for the SD card.

Write the image to the SD card using e.g. Win32 Disk Imager.

For setup, you’ll have to attach the Raspberry PI to your wired ethernet network. After setup, you can run it via Wifi only. Put the SD card into the Raspberry and start it up. After boot it’ll show its IP address on its display. Alternatively, you can look for new devices on your router, or using an IP range scanning tool.

Browse to http://YOURRASPBERRYIP and follow the setup wizard.

Make sure the SSD is attached and click on “+Use device” on the status screen. Then use the SSD as external system disk (UrBackup database, logs and temporary files will be stored on the SSD instead of the SD card).

If you want to store the backups to S3, select that you want to use the system disk as cache (or attach an additional SSD as cache only disk). If you want to store the backups to a local (USB) disks I’d recommend to also use the system disk as cache for the local USB disks (cached, auto-layout RAID).

ECC-RAM

If you are unlucky a single bit error in your Raspberry PI RAM can make the whole backup storage unwritable. In that case you’ll have to either make a new backup server and replicate everything (that is still readable) to that one, or simply start with a new backup server. The worst case is that it corrupts data in such a way that it does not detect the corruption, in which case you’ll only find there is a problem when you restore/actually want to use the backup.
That said, the probability of the RAM having problems is perhaps very low. We can probably trust the Raspberry PI foundation to have selected reliable RAM plus settings that minimize the risk of corruption.
The cloud/RAID backup storage has an advanced option “Size of in-memory write-back cache”. Per default it is disabled and you probably shouldn’t use it if you don’t have ECC-RAM as it increases the time data is kept in memory before it is written to checksum protected storage.

Discussion

Discuss the Infscape UrBackup Appliance here.

Connect clients with a HTTPS CONNECT web proxy

With 2.4.x you can use UrBackup with a HTTPS proxy. This way you can have the web interface and the clients connecting at the same port, secured by the same transport encryption (SSL). This post shows how to do this in combination with the Apache web server.

The idea is that the client connects to the web server and issues a HTTP CONNECT request to the actual UrBackup server.

First Enable CONNECT proxy module in apache. On debian via

a2enmod proxy_connect  

Then allow connections to the UrBackup server Internet port by adding

AllowConnect 55415

to your apache configuration.

Next in your apache virtual host configuration, set proxy options such as the timeout, allow proxy connections to the UrBackup server, and disallow them to every other host:

ProxyTimeout 600
ProxyRequests On  
<Proxy 127.0.0.1:55415>
</Proxy>
<ProxyMatch ^(?!127.0.0.1:55415$).*$>
    Order Deny,Allow
    Deny from all
</ProxyMatch>

Then, go to your UrBackup server web interface and setup your web server URL as Internet client proxy (https://example.com) and the Internet server name/IP as 127.0.0.1. Internet clients should then start connecting via your web server to your UrBackup server. Once all clients connect this way you could turn off UrBackup’s build in Internet transfer encryption and rely on SSL.

Fixing client IP addresses

You may notice that on the status page all Internet clients now show the IP address of your web server as their IP address. Fixing this is a bit difficult, as there is no standard way to forward the client IP address information from the web server (compared to a normal HTTP proxy where there is a X-Forwarded-For header). So, a bit of hacking to fix this is in order. I modified the mod_proxy_connect apache plugin to forward the client IP information in a 50 byte buffer to the backend: mod_proxy_connect.c
On debian you could replace your original mod_proxy_connect with the modified one via the following commands:

apt install apache2-dev
wget https://gist.githubusercontent.com/uroni/143c0d7ed6169e89f2d6c59a870dd4cc/raw/28dd30b1f82938777c504f2afdc5f162fd91b3fd/mod_proxy_connect.c
apxs -i -a -c mod_proxy_connect.c

Then in the UrBackup server advanced global settings set “List of server IPs (proxys) from which to expect endpoint information (forwarded for) when connecting to Internet service (needs server restart)” to include your web server IP (127.0.0.1 in the example here). After a server restart you should be able to see the actual client IP instead of the web server IP on the status screen.

Fixing SNI errors

If you have multiple virtual hosts with SSL there is an issue with SNI. Apache2 automatically compares the hostname in the CONNECT request with the server name in the SSL connection (SNI) and rejects the request if they differ. The only solution (or ugly hack) I found to fix this was to add the hostname with the target IP to /etc/hosts and then use the hostname instead of the IP in the CONNECT request. I.e., add “127.0.0.1 example.com” to /etc/hosts, then replace 127.0.0.1 with example.com in all the configuration above.

Additional proxy authentication

As additional security layer, one can require proxy authentication. Clients need to know a username+password to get through the web server to the UrBackup server. With apache2 e.g.:

 htpasswd -c -b /etc/apache2/urbackup_password urbackup passw0rd 

Then modify the proxy section to:

<Proxy 127.0.0.1:55415>
    AuthType Basic
    AuthName "Restricted UrBackup"
    AuthBasicProvider file
    AuthUserFile "/etc/apache2/urbackup_password"
    Require user urbackup
</Proxy>

Afterward add username+password to the proxy url, that is e.g. https://urbackup:password@example.com

UrBackup Windows Installer creator

If you wanted to create a generic UrBackup client installer for your internet server you’d have to create one yourself following instructions here .

I have made https://installercreator.urbackup.org/ to make this process easier. Given the correct parameters it’ll create a executable for you that’ll create a client on your server, then download the client installer for this newly created client and then run this installer. It’ll use the computer name as default client name, optionally appending a random string, such that name collisions do not occur.

Image mounting in UrBackup Server 2.1.x

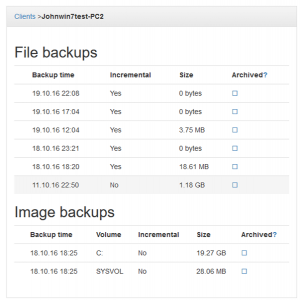
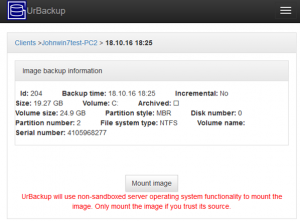
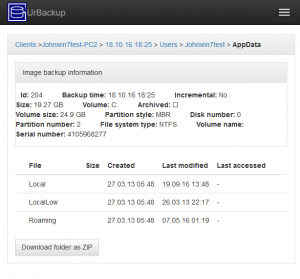
UrBackup 2.1.x can now mount image backups. That is, it lists the image backups it has on the web interface, you can browse into them and e.g. download files or directories as a ZIP file.
I am particularly proud that this works on Linux as well as on Windows with both raw image files and VHD(z) files. On FreeBSD it only works with raw image files currently. The screenshots are from a Windows UrBackup server.

On Linux it uses libguestfs-tools to mount images in a sandboxed virtual machine. On Windows/FreeBSD mounting a hostile image may be a dangerous operation.

How I backup LVM volumes on my Xen server

I’ve got a Xen server which runs a couple of Linux and Windows VMs. The VMs are stored in LVM volumes on a LVM volume group which is on a bcache device. The bcache device consists of a mirrored SSD pair (using mdraid) as cache and a mirrored HDD pair (also using mdraid) as backing storage. The SSD caching gives a nice performance boost, but nowadays I would go with SSD storage only, because bcache caused some problems (did not play nice with udev during boot).
The Windows VMs are backed up by installing the UrBackup client in the VMs. To restore I’d need to boot the restore CD in Xen or restore the Windows images via command line in the hypervisor.
The Linux VMs are backed up at hypervisor level in the Xen dom0 (which is Debian in this case) using LVM snapshots. To create and remove LVM snapshots I have following snapshot creation and removal script (the volume group on which the volumes are is mirror-vg).

Snapshot creation script at /usr/local/etc/urbackup/create_filesystem_snapshot:

#!/bin/bash
set -e
SNAP_UID=$1
VOLNAME="$5"
VGNAME="mirror-vg"
if [[ $VOLNAME == "" ]]; then
        echo "No volume name specified"
        exit 1
fi
if [[ $VOLNAME == "other-data" ]]; then
        VGNAME="data2-vg"
fi
if [[ $SNAP_UID == "" ]]; then
        echo "No snapshot uid specified"
        exit 1
fi
export LVM_SUPPRESS_FD_WARNINGS=1
lvcreate -l100%FREE -s -n $SNAP_UID /dev/$VGNAME/$VOLNAME
SUCCESS=0
trap 'test $SUCCESS = 1 || lvremove -f /dev/$VGNAME/$SNAP_UID' EXIT
mkdir -p /mnt/urbackup_snaps/${SNAP_UID}
mount -o ro /dev/$VGNAME/$SNAP_UID /mnt/urbackup_snaps/${SNAP_UID}
SUCCESS=1
echo "SNAPSHOT=/mnt/urbackup_snaps/$SNAP_UID"
exit 0

Snapshot removal script at /usr/local/etc/urbackup/remove_filesystem_snapshot:

#!/bin/bash
set -e
SNAP_UID=$1
SNAP_MOUNTPOINT="$2"
if [[ $SNAP_UID == "" ]]; then
        echo "No snapshot uid specified"
        exit 1
fi
if [[ "$SNAP_MOUNTPOINT" == "" ]]; then
        echo "Snapshot mountpoint is empty"
        exit 1
fi
if ! test -e $SNAP_MOUNTPOINT; then
        echo "Snapshot at $SNAP_MOUNTPOINT was already removed"
        exit 0
fi
if ! df -T -P | egrep "${SNAP_MOUNTPOINT}\$" > /dev/null 2>&1; then
        echo "Snapshot is not mounted. Already removed"
        rmdir "${SNAP_MOUNTPOINT}"
        exit 0
fi
if lsblk -r --output "NAME,MOUNTPOINT" --paths > /dev/null 2>&1; then
        VOLNAME=`lsblk -r --output "NAME,MOUNTPOINT" --paths | egrep " ${SNAP_MOUNTPOINT}\$" | head -n 1 | tr -s " " | cut -d" " -f1`
else
        VOLNAME=`lsblk -r --output "NAME,MOUNTPOINT" | egrep " ${SNAP_MOUNTPOINT}\$" | head -n 1 | tr -s " " | cut -d" " -f1`
        VOLNAME="/dev/mapper/$VOLNAME"
fi
if [ "x$VOLNAME" = x ]; then
    echo "Could not find LVM volume for mountpoint ${SNAP_MOUNTPOINT}"
    exit 1
fi
if [ ! -e "$VOLNAME" ]; then
    echo "LVM volume for mountpoint ${SNAP_MOUNTPOINT} does not exist"
    exit 1
fi
echo "Unmounting $VOLNAME at /mnt/urbackup_snaps/${SNAP_UID}..."
if ! umount /mnt/urbackup_snaps/${SNAP_UID}; then
        sleep 10
        umount /mnt/urbackup_snaps/${SNAP_UID}
fi
rmdir "${SNAP_MOUNTPOINT}"
echo "Destroying LVM snapshot $VOLNAME..."
export LVM_SUPPRESS_FD_WARNINGS=1
lvremove -f "$VOLNAME"

The snapshot scripts are specified via the file /usr/local/etc/urbackup/snapshot.cfg:

create_filesystem_snapshot=/usr/local/etc/urbackup/create_filesystem_snapshot
remove_filesystem_snapshot=/usr/local/etc/urbackup/remove_filesystem_snapshot
volumes_mounted_locally=0

Then I have a virtual client for each LVM volume that needs to be backed up. I have put those virtual clients in a settings group with the default path to backup “/|root/require_snapshot”.

For restore I need to recreate the LVM volume. Create a file system on it (e.g. with mkfs.ext4) mount it in the hypervisor and then restore via.

urbackupclientctl restore-start --virtual-client VOLUMENAME -b last –map-from / --map-to /mnt/localmountpoint

Windows Backup API support in UrBackup 2.1.x

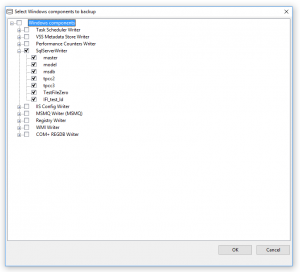
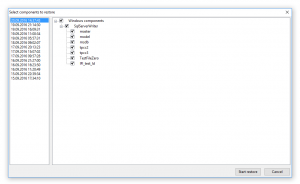
UrBackup 2.1.x has more completselect_windows_componentse Windows Backup API support. Previously the backup API was only used to create snapshots of the specified paths to backup (volume shadow copy snapshots). Now it does a so called component level backup, if configured to do so. You can select the components to backup via the client user interface and then the selected components automatically communicate to UrBackup which files need to be backed up, and on restore it communicates where the files should be restored and if e.g. services should be restarted during/after restore.select_restore_components

This works with applications which in turn support the Windows Backup API, such as for example Microsoft Exchange, Microsoft SQL Server, Microsoft Hyper-V, Oracle DB on Windows.

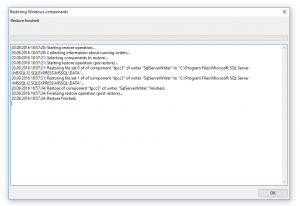
Testing backup and resrestore_componentstore with those different applications is now the big item on the to-do list. Every help and pointers to applications where backup or restore is broken will be helpful.

Visual Studio 2015 runtime and MSI installer

If you are using the MSI installer to install either UrBackup Client or Server on Windows there is a potential problem you might run into.

Starting with Visual Studio 2015, with which UrBackup Client/Server 2.x are compiled, Microsoft decided to split the Visual Studio runtime into a operating system level component (Universal Runtime) and another “normal” runtime component, wheras earlier it was only a “normal” runtime component.
The operating system component is installed via Windows Update and cannot be installed by a MSI installer. With Windows 10 it is always installed, but with Windows Vista or 8.1 the system needs to be up to date in order for the system component to be present (KB2999226), otherwise UrBackup will not start.

Another work-around is to use the .EXE (NSIS) Installer which includes the operating system compontent. Installation depends on Windows Update functioning correctly (which it may not).

Let’s just say this change does not make the software developer’s and user’s life easier.